-
Set up your portal: brand colors, pages, top tasks and room pages.
-
Add content: Explore cards, More items, General information.
▶ Prefer video?
Step 1: Set up your portal
Click the Guest Portal (phone) icon in the left menu, then Settings. Set your brand colors, switch on the pages guests need and pick 3 top tasks.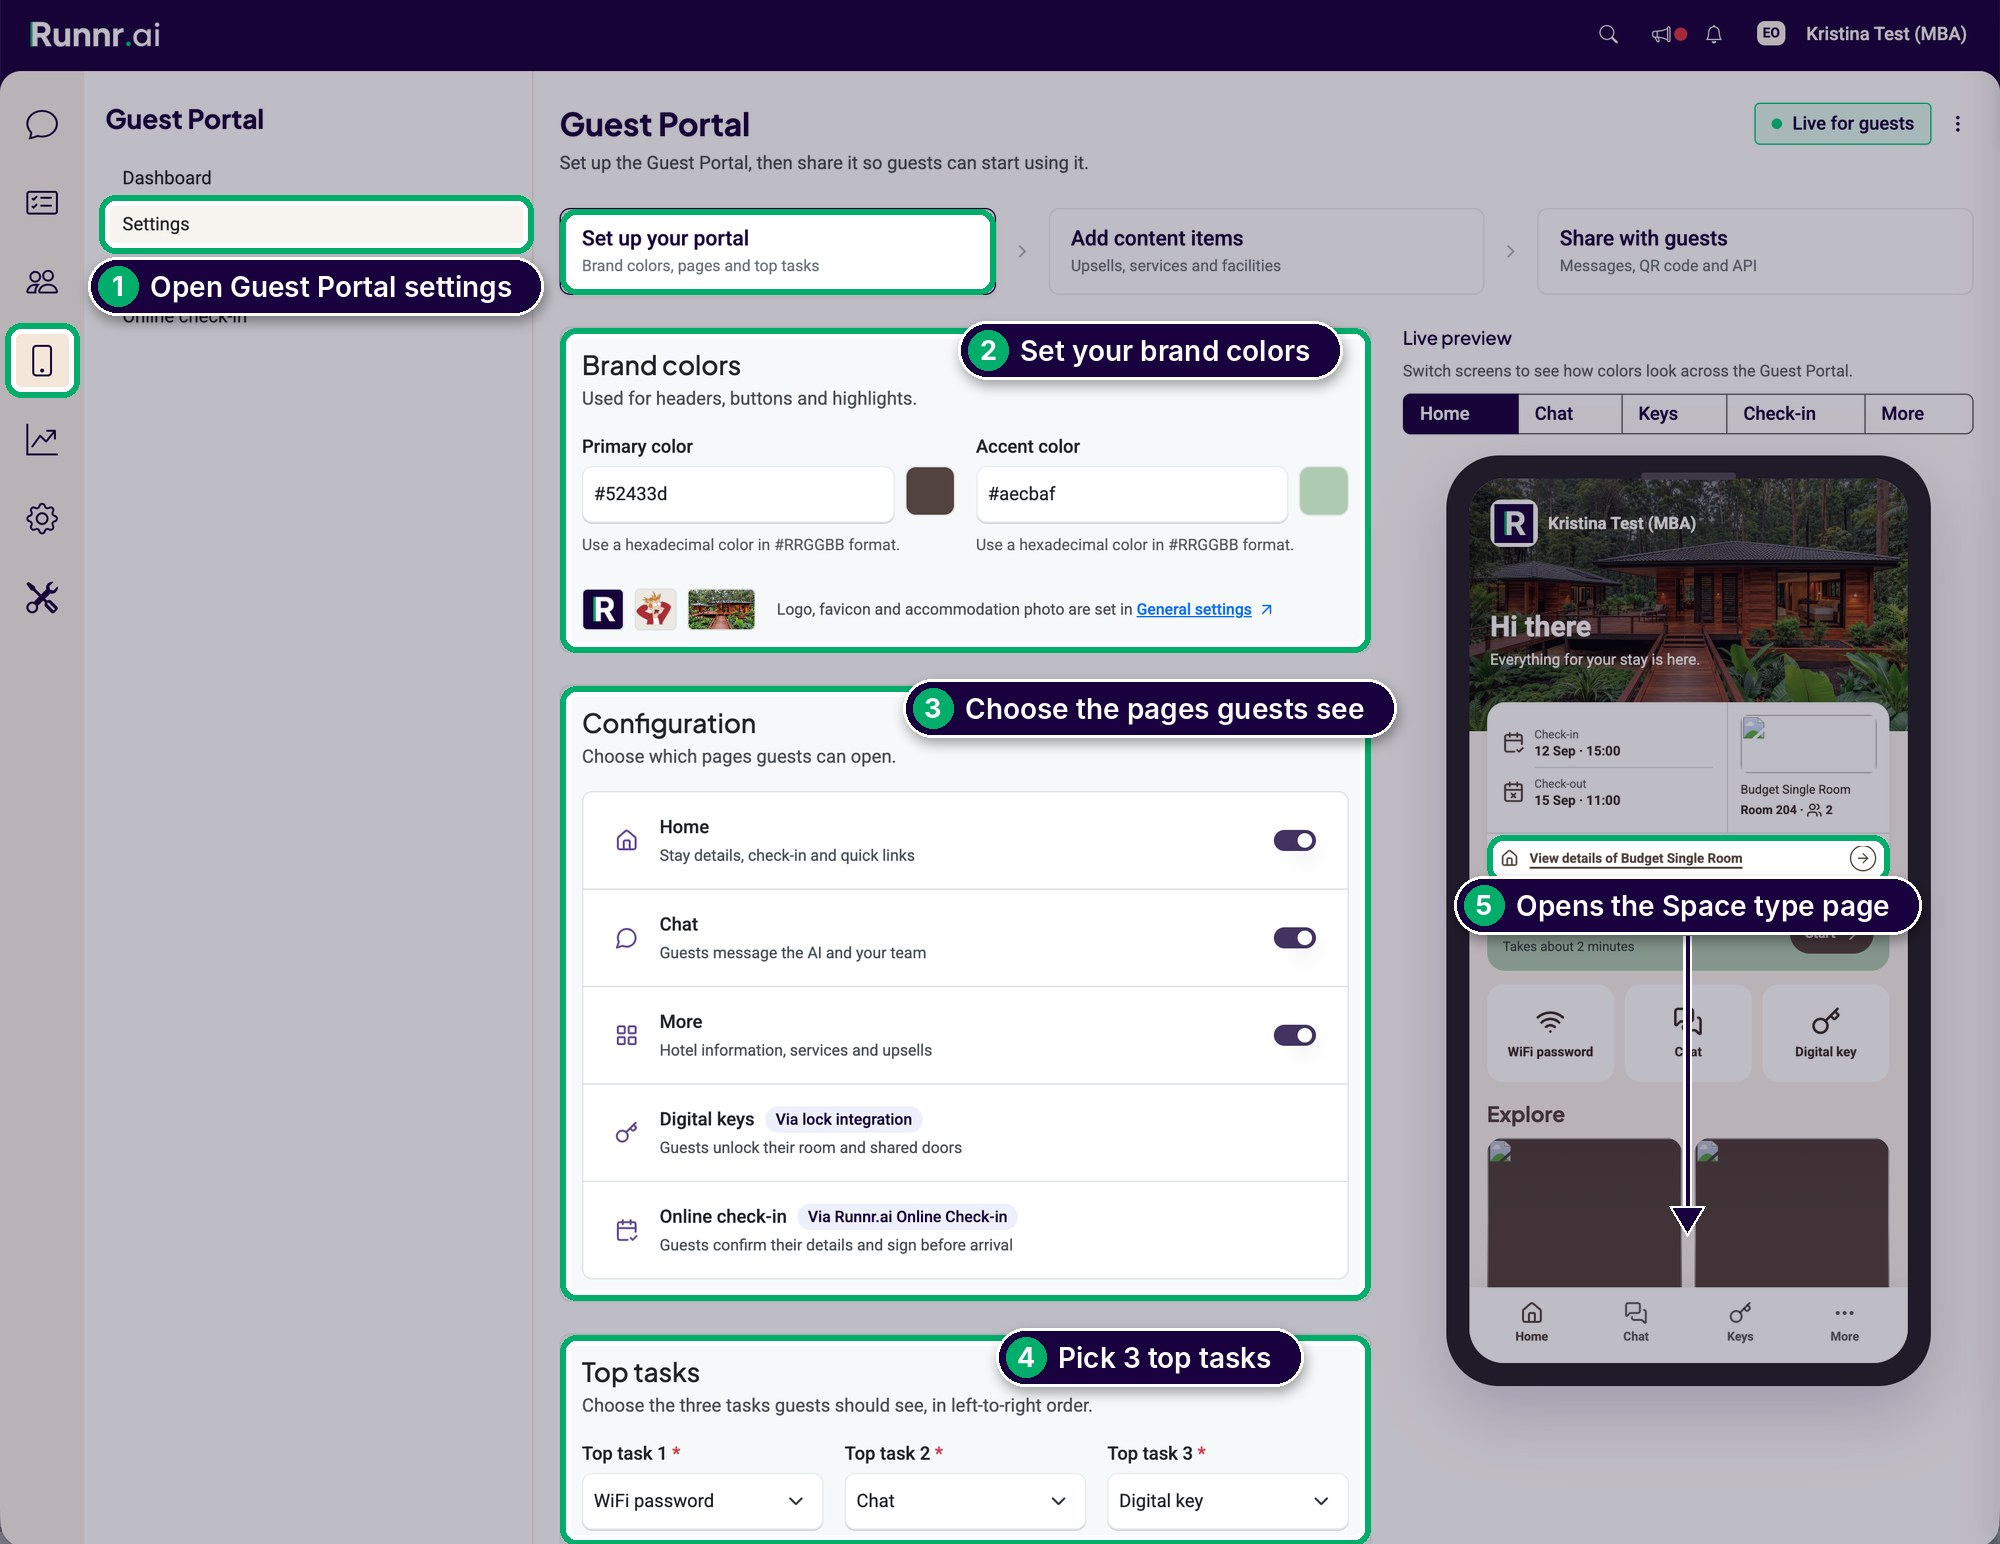
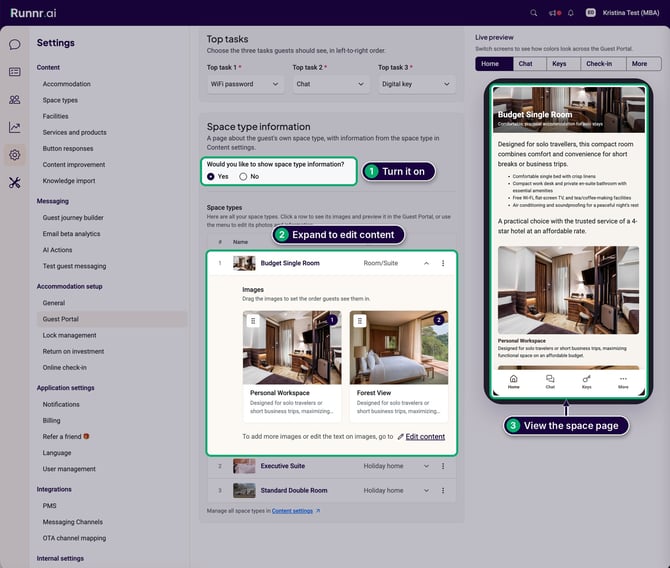
Show details about the stay's space type and more details in the dedicated space page. Access the space page from the Checkin/Checkout detail.
Step 2: Add content
Home page - Explore cards
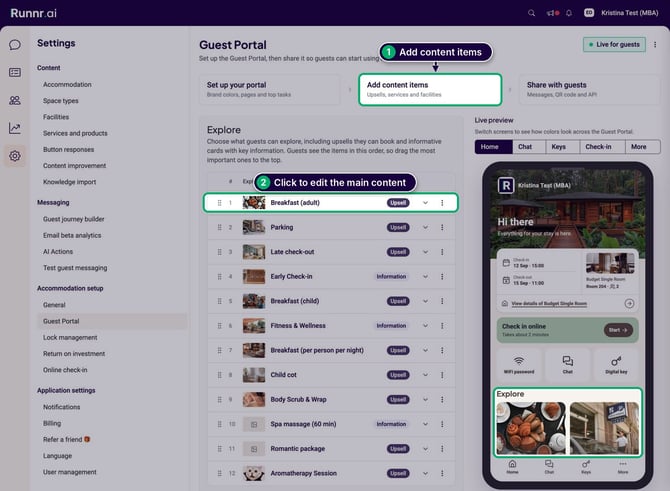
You can add upsells and information cards to the home page. Drag cards to reorder them, click a row's arrow to edit it, and add more to the list. We recommend 4-8 items!
More page - Services, facilities and general info
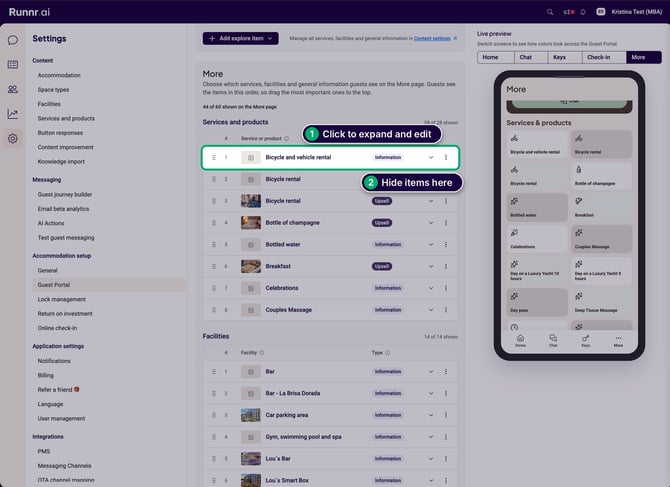
All other services, products, facilities, and information topics not shown on the home page shows on the More page. Drag items to reorder them and hide/show certain ones.
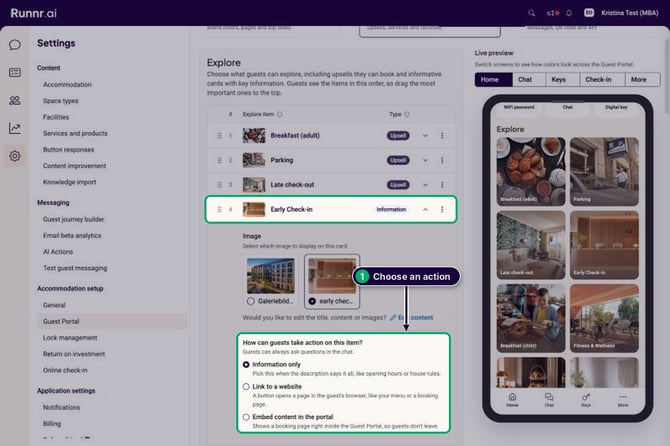
Share a link or embed content within Information cards
You can add links or embed content like an activity scheduler within information only content items. Expand a row marked "Information" to add a link or content.
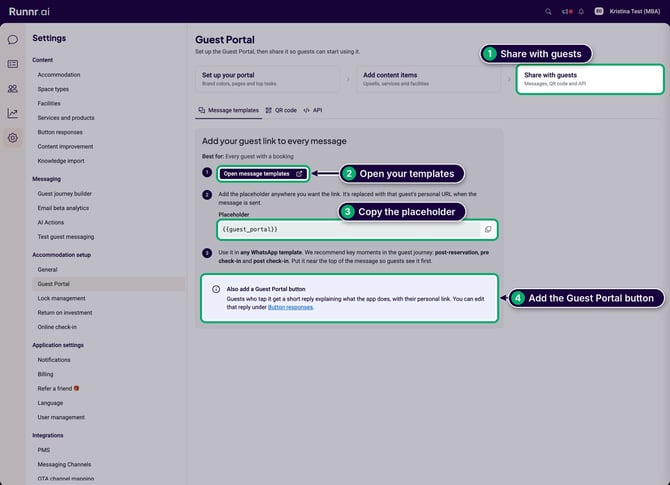
Step 3: Share with guests
This is the step that gets guests to start using your portal. Start with message templates, then add the QR code.
Message templates (recommended, PLUS plan)
Add the guest portal into your message templates so guests get their unique portal link in initiated messages. Open the Share with guests tab and click Open message templates.
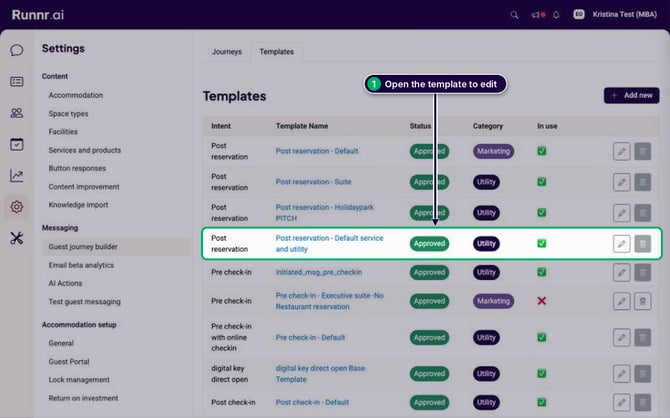
Pick a template, such as Post-reservation or Pre-check-in.
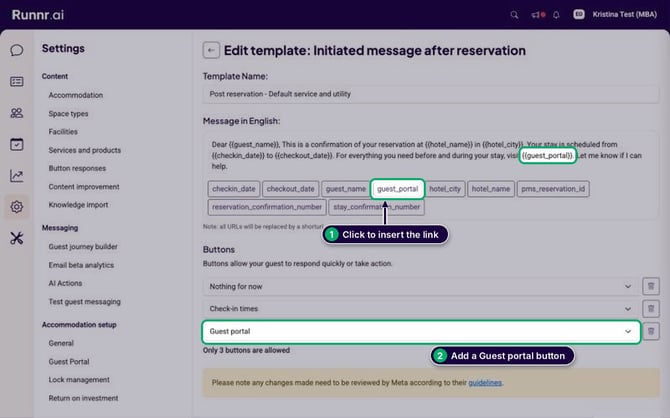
Click the guest_portal chip to insert the link, then add a Guest portal button and save. WhatsApp templates may need a short Meta review before they go live.
Message templates (recommended, Professional plan)
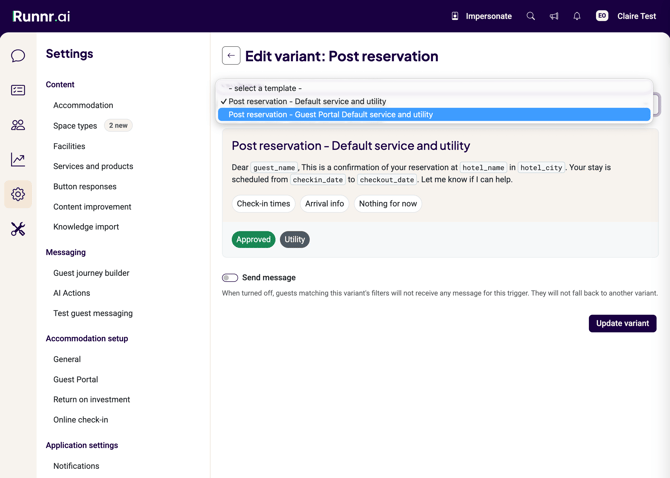
Go to your guest journey builder, open the post-reservation message. Select the Guest Portal Default Service and utility template.
QR code
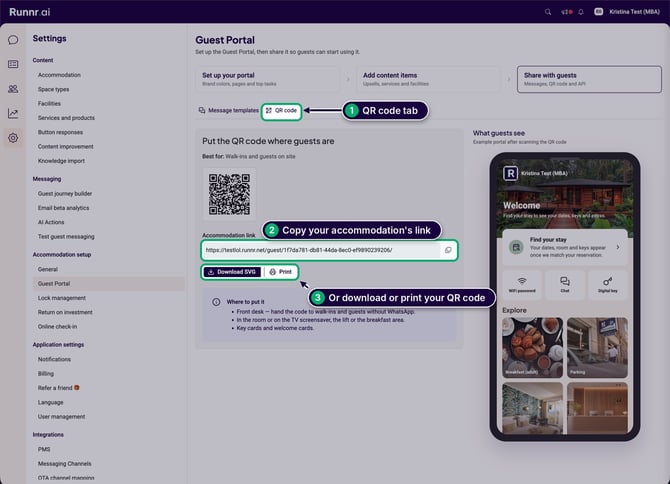
On the QR code tab, copy your accommodation's link or download and print the code.
API
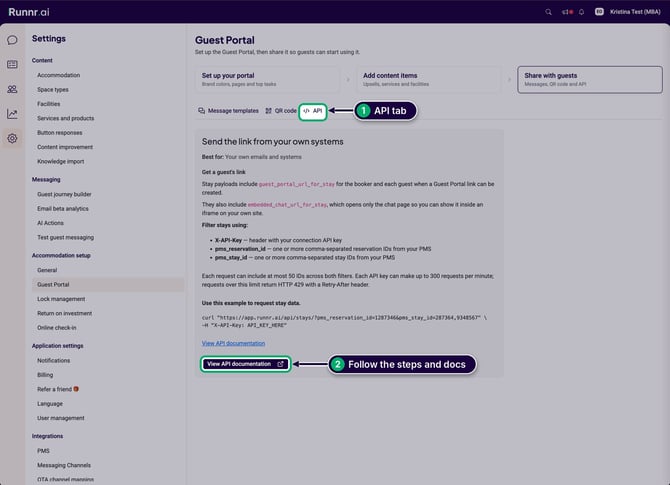
You can add the portal link to your own app or website using our API integration.
Step 4: Track results
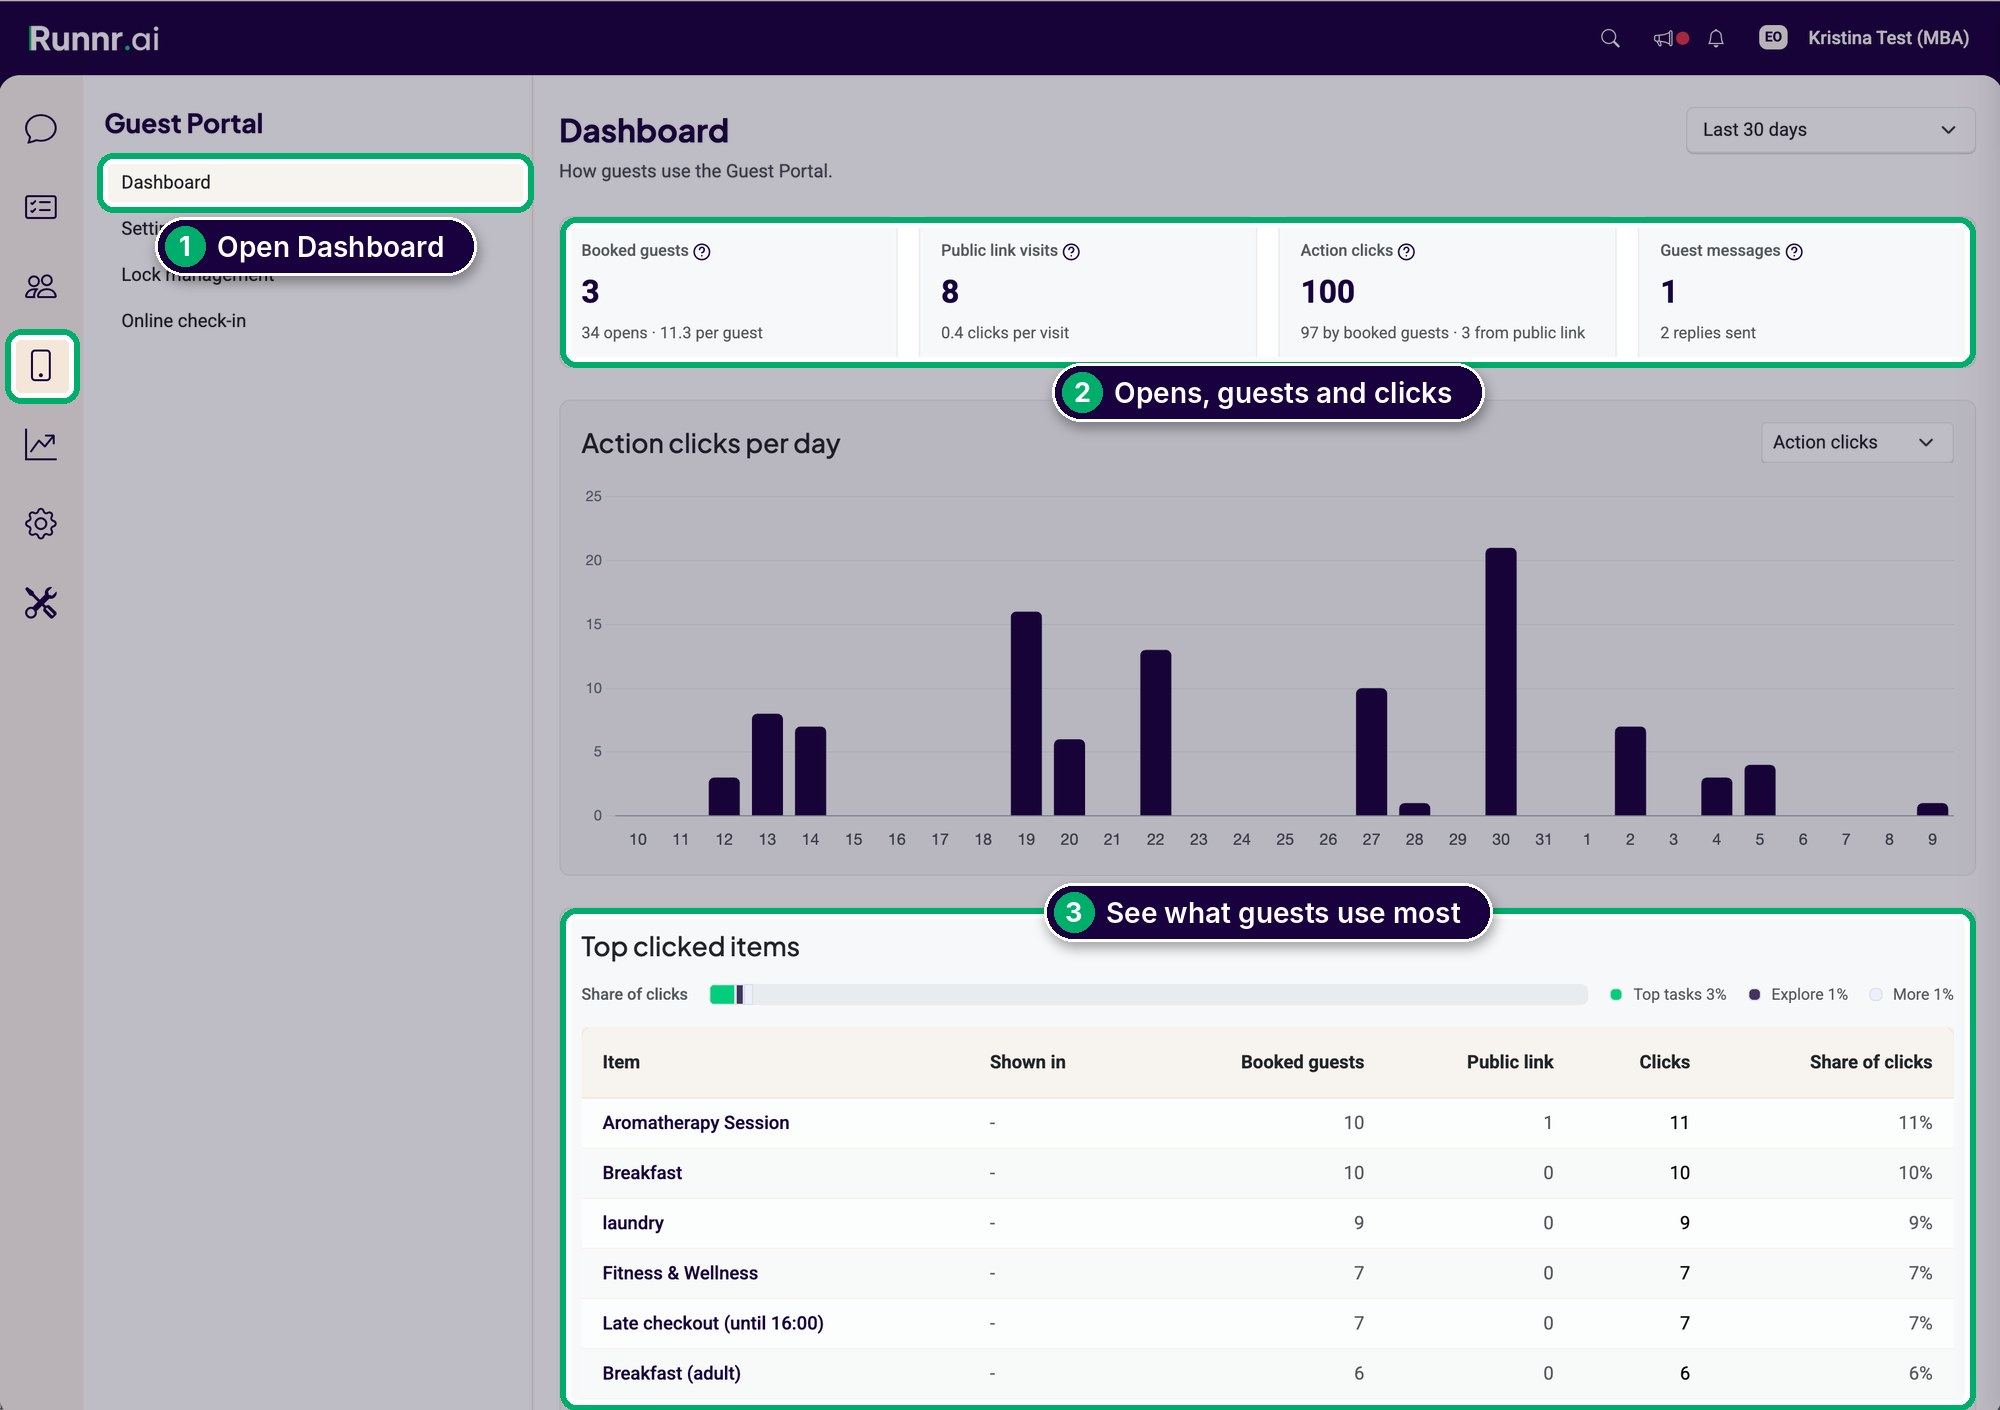
Under Analytics → Guest Portal analytics, see opens, guests, clicks and QR scans.
Viewing an actual guest's portal
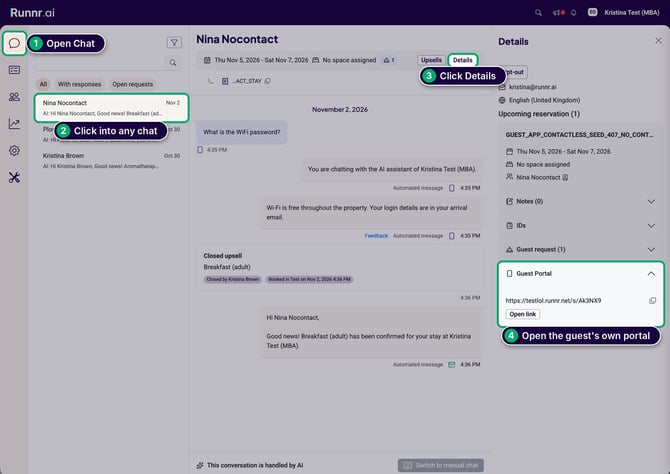
To see exactly what one guest sees, open Chat, click into a chat, click Details, then open Guest Portal and click Open link (or create link) to view their live portal.